How to Mount an EFS on an EC2 Instance


Introduction
Amazon Elastic File System(EFS) is a file storage service on AWS that is scalable, elastic and concurrent and can be used with AWS EC2 instances or on-premises servers. EFS can be shared amongst multiple instances in different availability zones. However, the file system must be available in the same availability zone as the instance it is to be mounted on.
Amazon EFS is a serverless service and scales automatically up to petabytes as you add and remove files. You only pay for the storage your file system uses.
This article gives a walkthrough on how to create an Elastic file system spanning different availability zones(AZs) and mounting it on an EC2 instance.
Prerequisites
- An AWS Account
- An AWS user with an IAM role that has the necessary permissions to create resources
- Make sure you have a key pair that will be used to SSH into the EC2 instance
Creating the EFS
First, create a security group for EFS that allows NFS port 2049 inbound from the EC2 instance.
On the AWS Console, search for security groups and select Create security group. Give the security group a name and description of your choice, then add the following inbound rule and create the security group.

Search for Elastic File System on the AWS console. On the EFS page, select Create File System, then select Customize.
On the File System Settings page, everything can be left with its default options. The Network Access page should look like this:
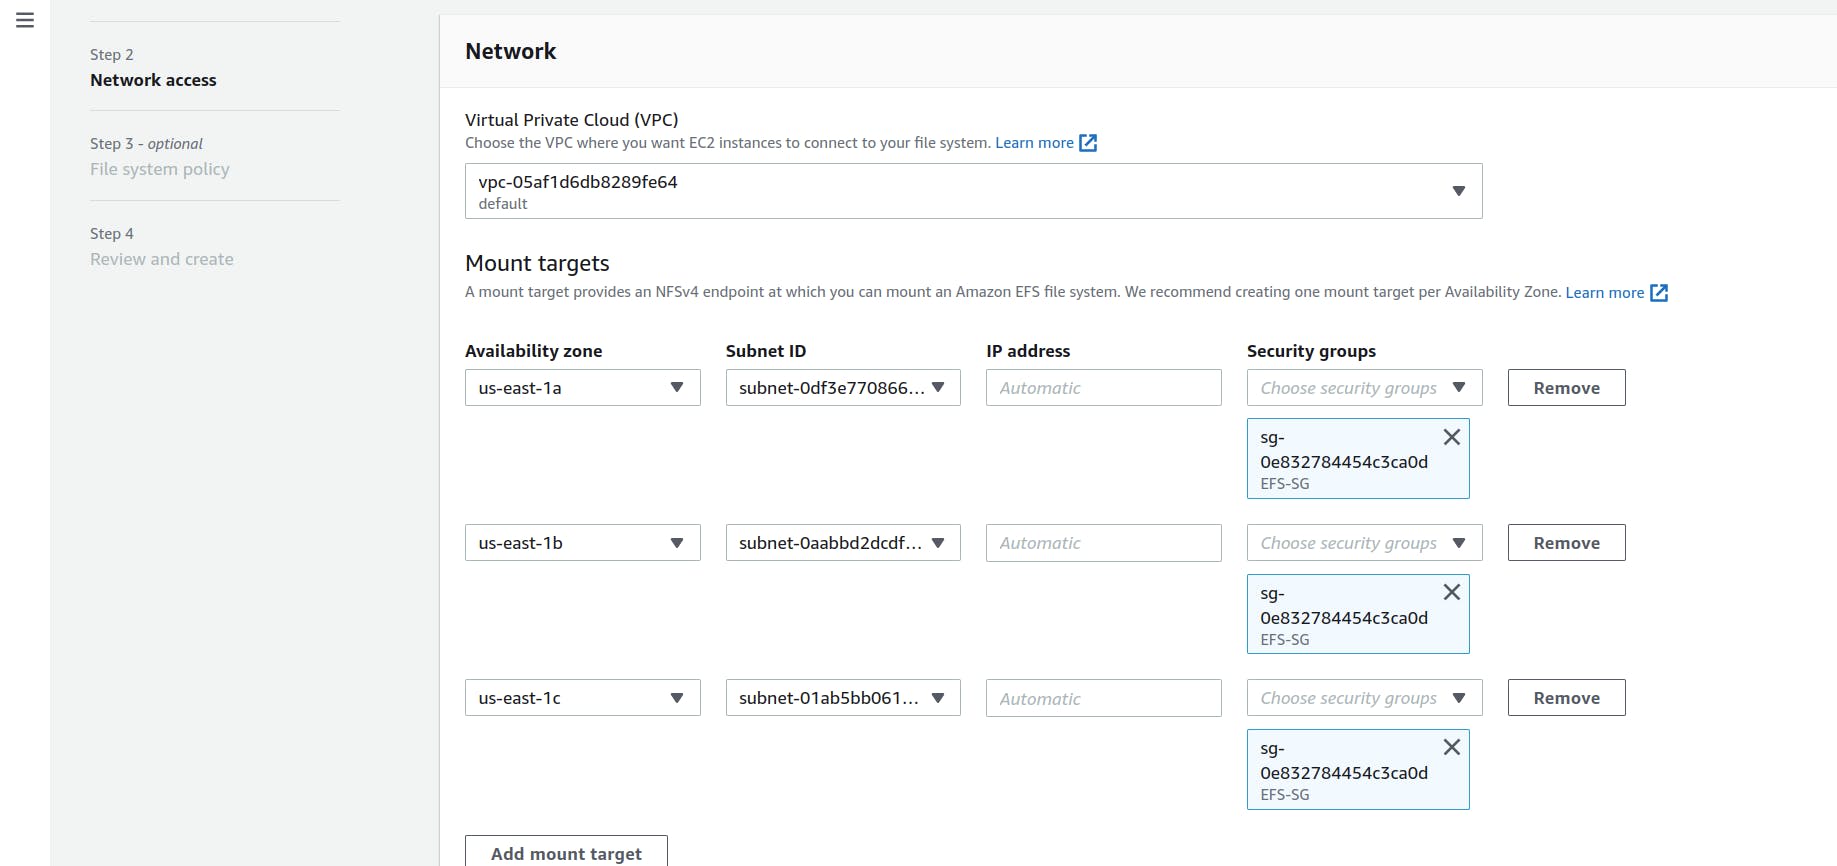
Take note of the availability zones and make sure to attach the EFS security groups to each of the availability zones. You don't have to select all AZs, like 2 or 3 should suffice. Leave every other thing on the File system policy page as default and then Review and Create.

Creating the EC2 Instance
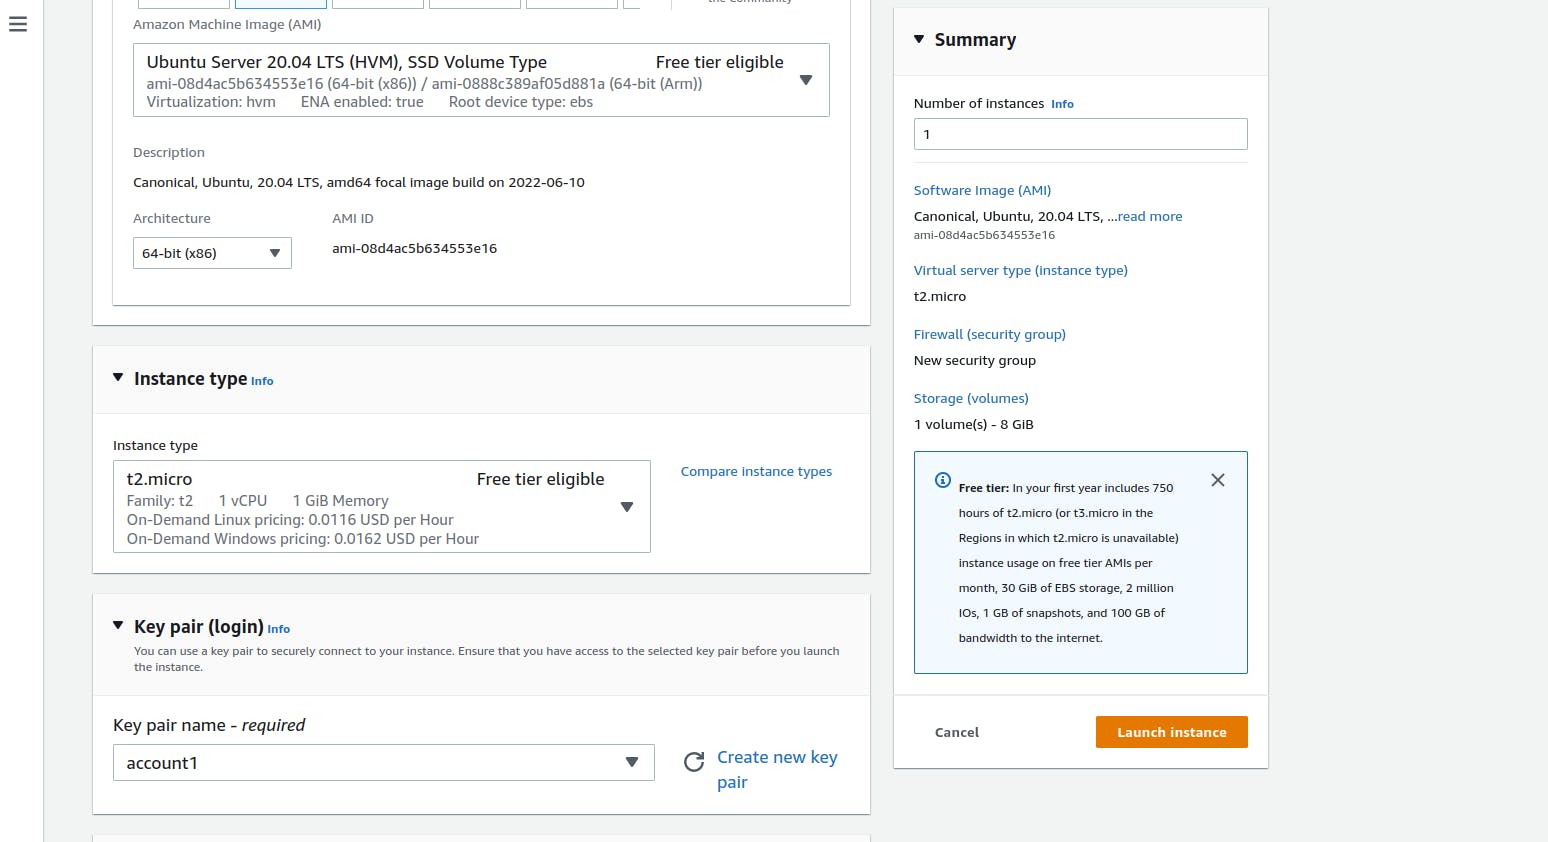
Go to the EC2 page and click on launch instance. Give the instance a name of your choice. Select the Ubuntu 20.04 image, a t2.micro instance type and a key pair.
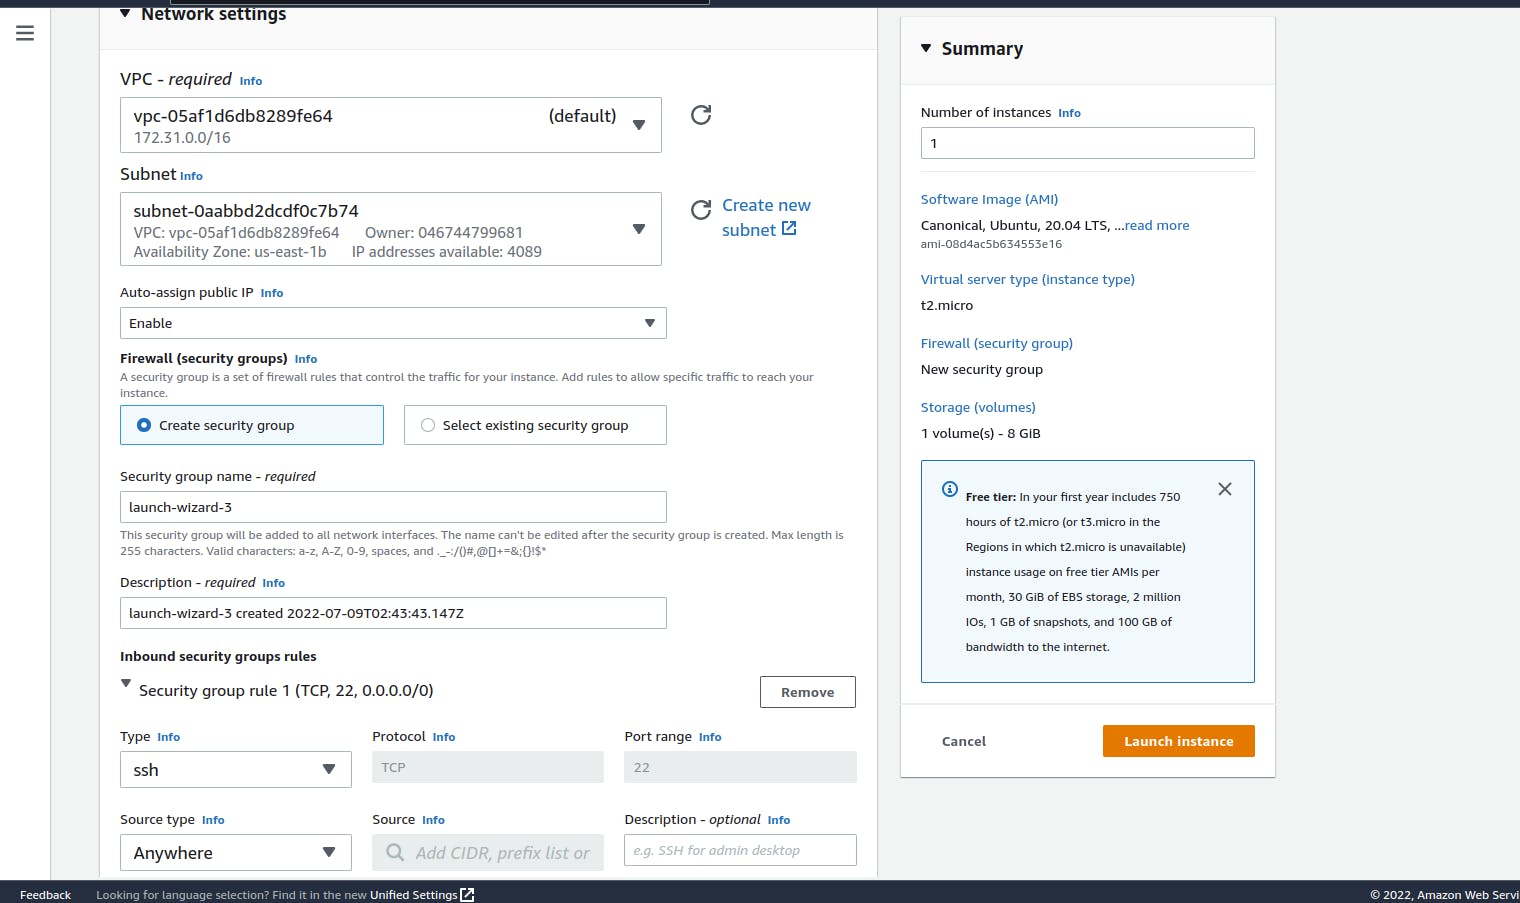
Edit the network settings and pick subnet with one of the AZs as the EFS. Make sure port 22 is open on the inbound rule and leave every other option as default.
Mount EFS on the EC2 Instance using the EFS mount helper
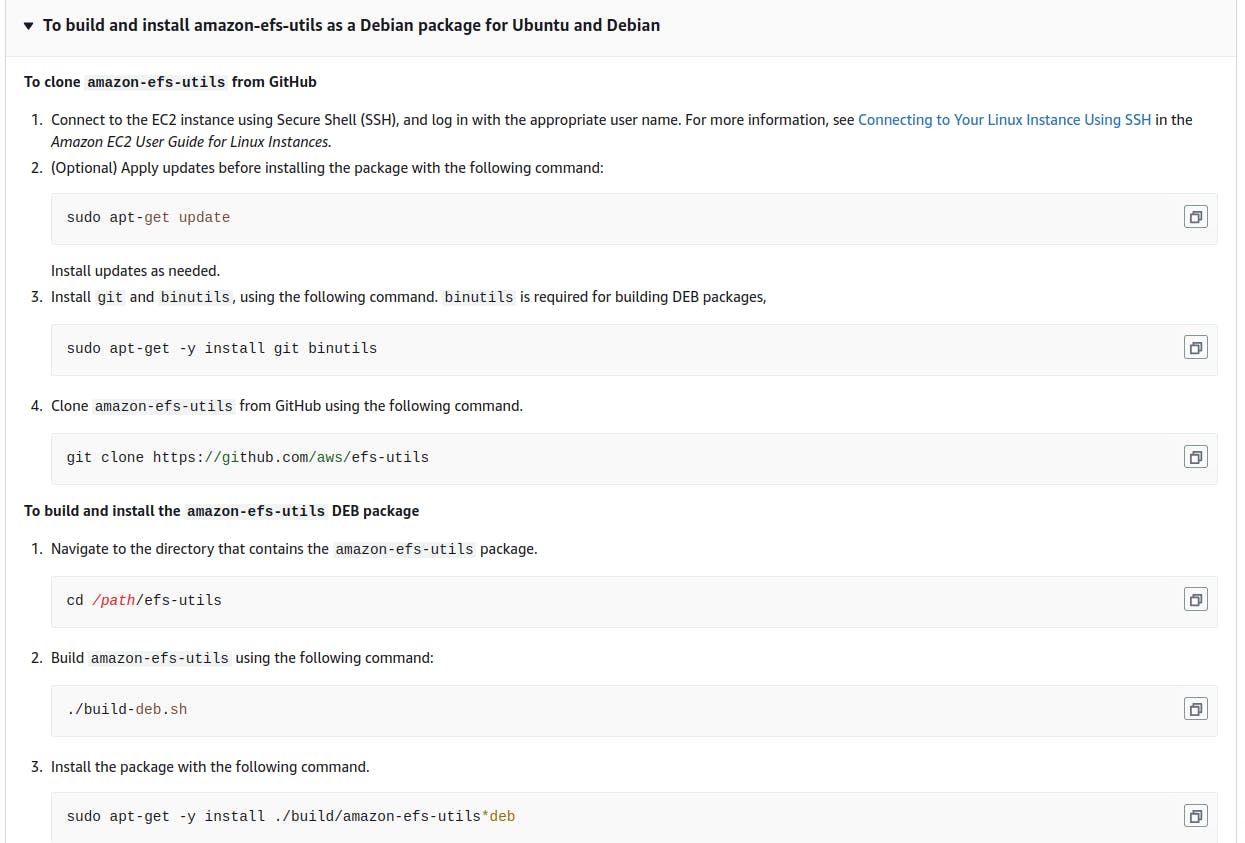
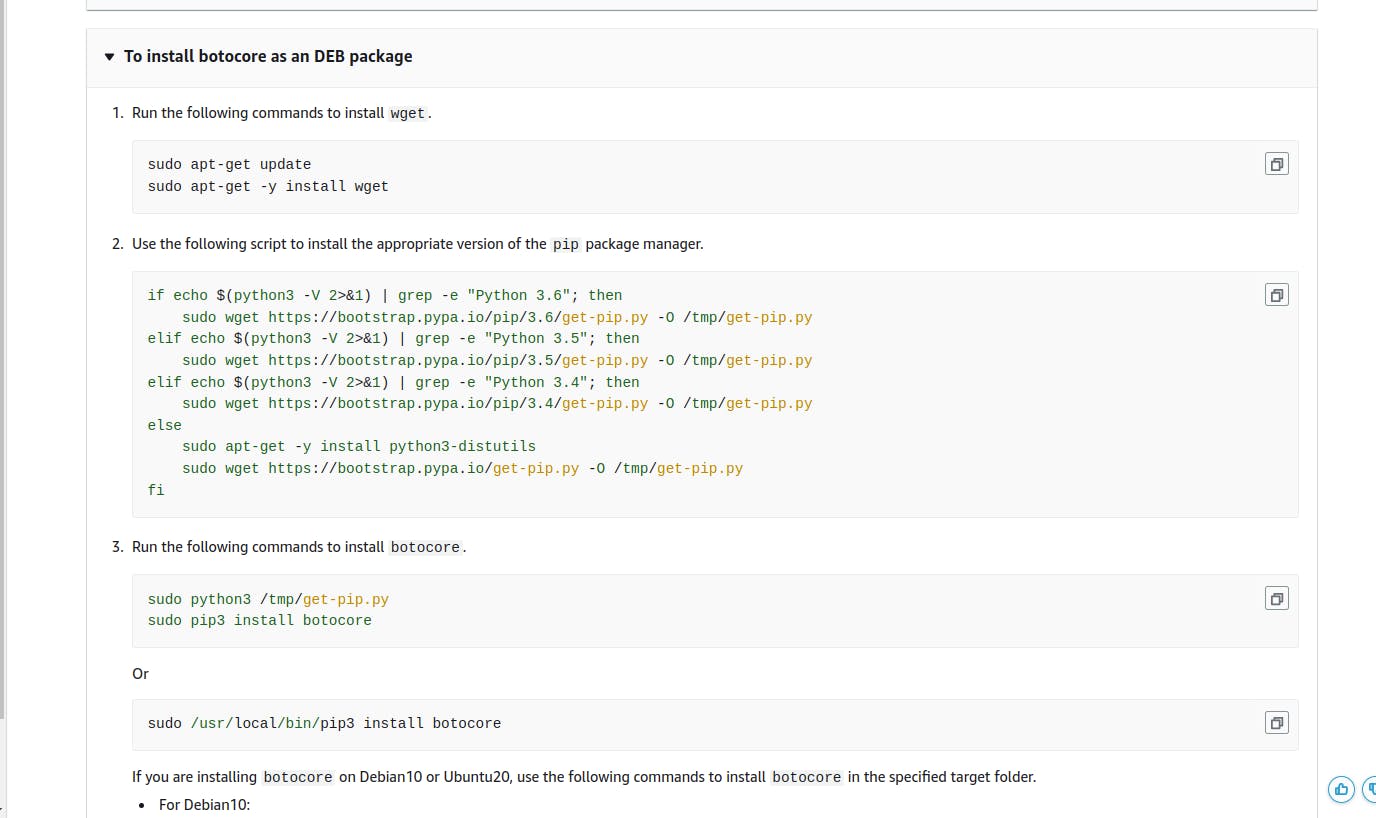
First, you have to install amazon-efs-utils and botocore. Installation guide for amazon-efs-utils and botocore.
Create a directory efs that you will use as the file system mount point.
mkdir efs
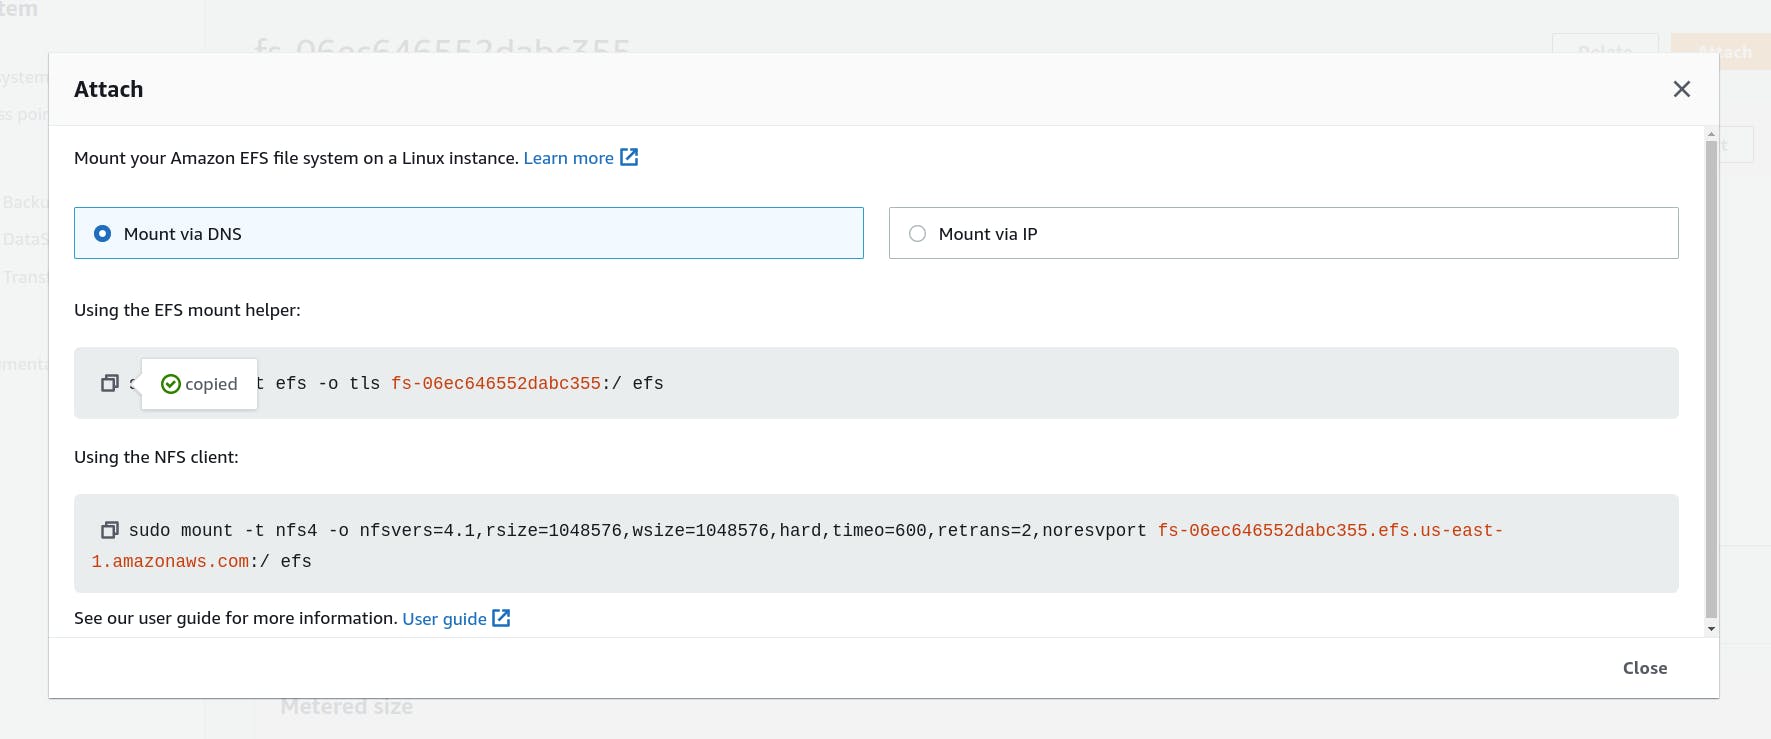
On the AWS console, go to the EFS page and select the file system that was created earlier. Select Attach and copy the command that says Using the EFS mount helper

To confirm that the file system has successfully been mounted, run the df -h command.
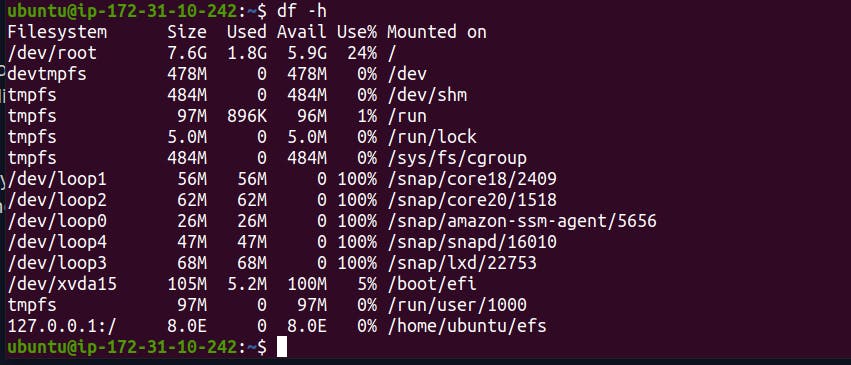
You should see a mount point in the efs directory that was created.
Conclusion
This article explains how to create an Elastic File system and mount it on an EC2 Instance.
Thanks for reading!
Video Reference: YouTube